NUX Dual Loop Stereo Product Review
NUX Dual Loop Stereo (Dual Looper) Guide: How It Works, Setup, and Performance Tips
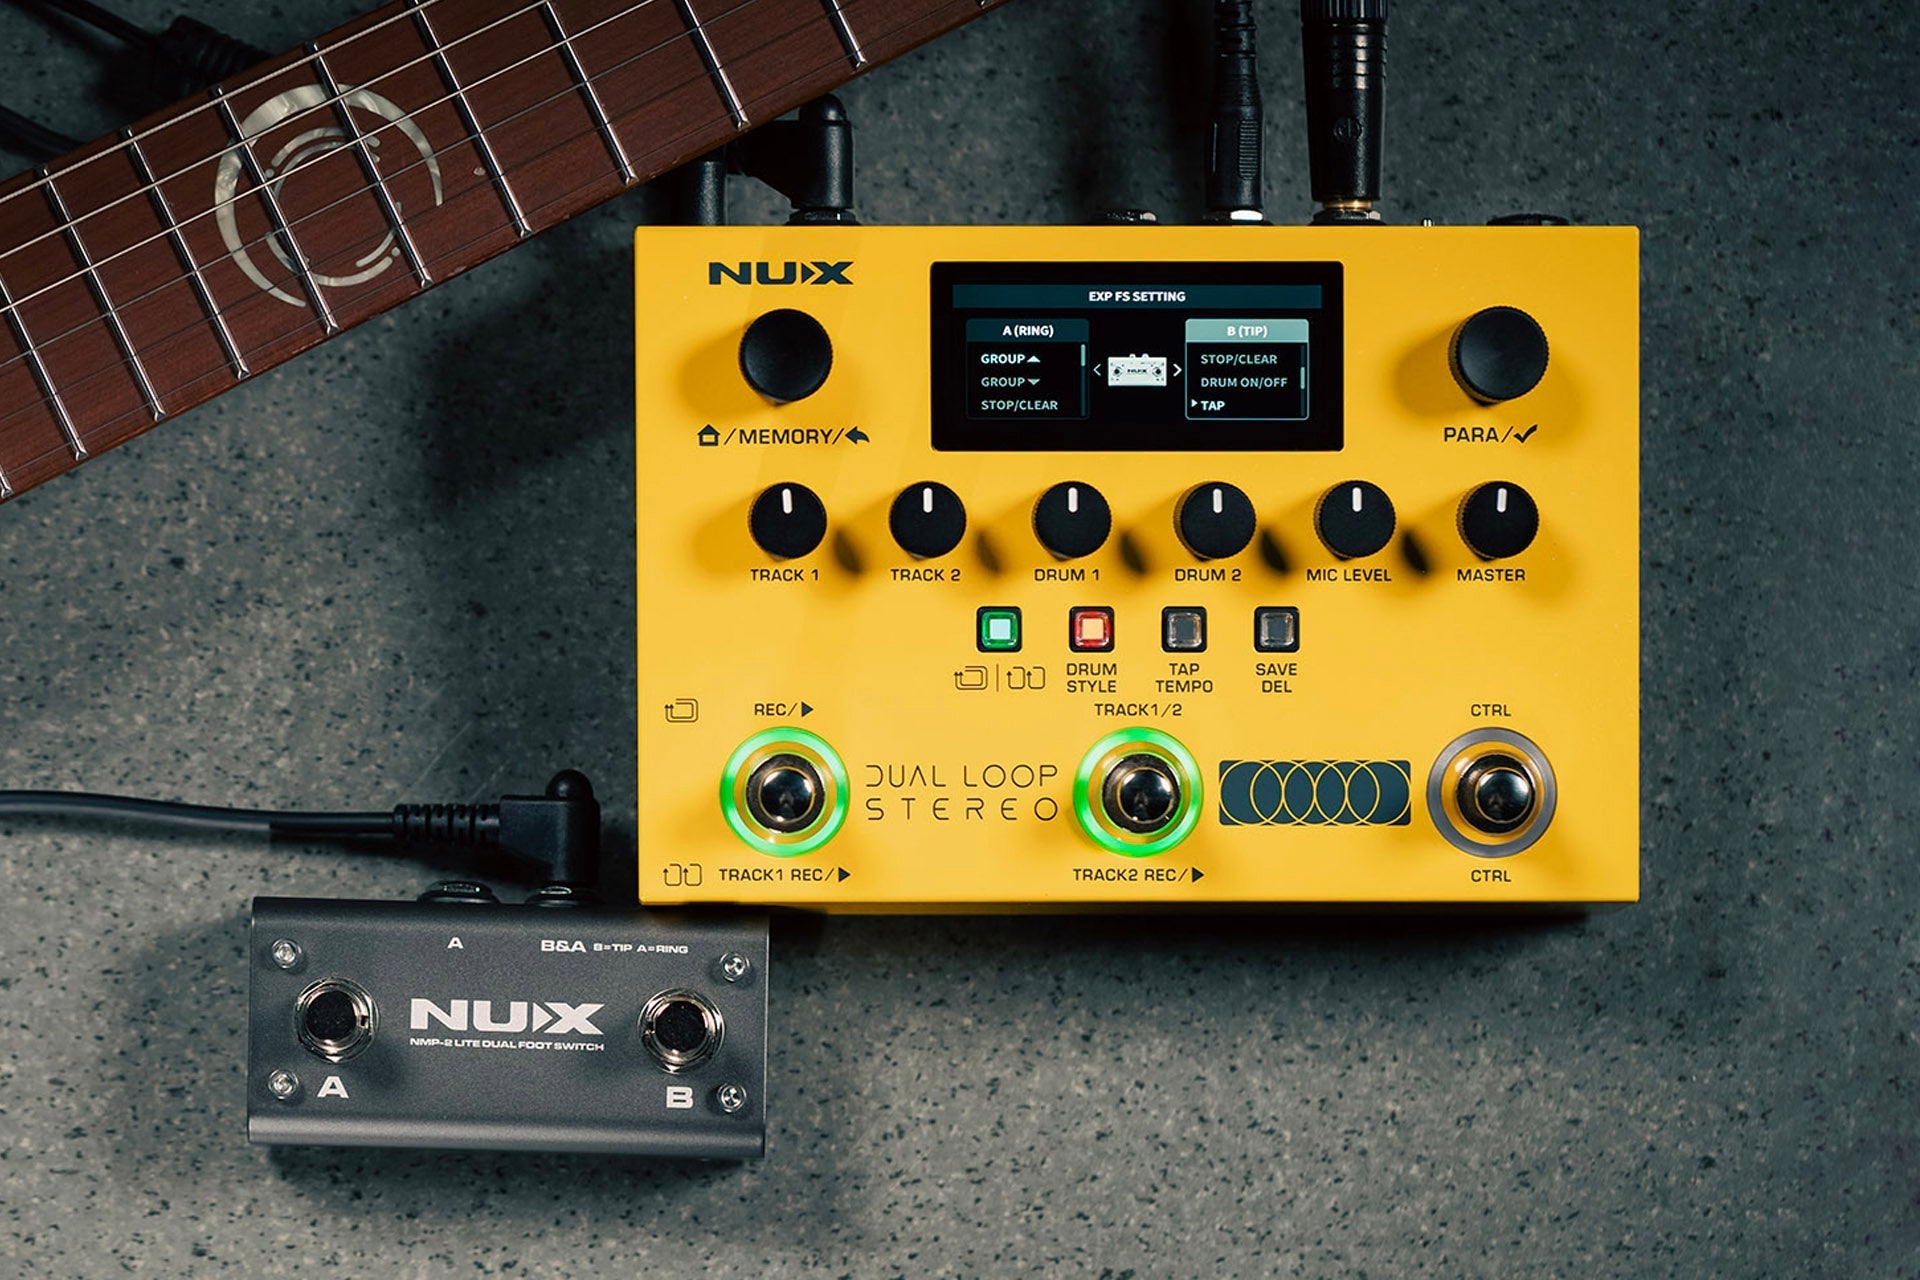
The NUX Dual Loop Stereo is a compact, pedalboard-friendly looper designed for fast looping and more dynamic performances. It combines stereo connectivity, optional drum and rhythm backing, MIDI, an expansion pedal port, and a couple of ways to record two parts without getting lost in deep menus.
This guide explains what the Dual Loop Stereo does, who it is for, how to set it up, and practical ways to use it for “A/B” song sections, practice, and live coverage.
What the NUX Dual Loop Stereo is (and why it stands out)
At its core, this looper is built around two looping tracks with options for either:
- Separate playback (two parts can run independently)
- Synced playback (both tracks locked to the same timing grid)
On top of that, it includes built-in drum and rhythm generation that can be configured per track or enabled/disabled depending on how you want to perform.
Key practical reasons people look at a dual-track stereo looper like this:
- More than one layer without needing a computer
- Song-structure looping (intro/verse on Track 1, chorus/bridge on Track 2)
- Fast hands-on control for recording, stopping, and switching parts
- Stereo I/O for cleaner routing when using amps, modelers, or stereo rigs
Key features to know before you plug in
Inputs and outputs
- Instrument input for guitar or line-level sources depending on your rig
- Additional input supporting a microphone instrument option with phantom power (useful for vocal mics or certain dynamic setups that require it)
- Stereo outputs for cleaner stereo routing to an amp or audio interface
- Aux input for adding an external audio source
Tempo, drums, and two-track behavior
The pedal supports a tap tempo workflow. Depending on the mode you choose, it can generate or manage rhythm content that supports your loops.
The two-track design lets you:
- Record one section, then add another while the first continues
- Switch tracks to create an arrangement-like performance
- Optionally keep timing synchronized so both tracks align to the same loop grid
Effects built in
Integrated effects help you avoid extra pedals when you just want your loop to sound finished:
- Octave style effect
- Boost for solos or emphasis
- Cab sim (useful when you want amp-like character without running through a separate cab sim chain)
- Reverb for space
These effects can be part of your loop chain, depending on how you set the system options and expansion control.
MIDI and expansion
- MIDI in and out for synchronization with other gear
- Expansion pedal port to add a dedicated control footswitch style action (for example: triggering effects or changing functions)
- USB-C for computer editing and configuration
Basic setup: getting usable results quickly
If your goal is “plug in and loop,” focus on signal flow and level. The Dual Loop Stereo is most straightforward when you treat it like a performance looper in your chain.
1) Connect the essentials
- Guitar or instrument into the instrument input
- From the stereo outputs to your amp, mixer, or audio interface inputs
- If using a mic on the second input, confirm phantom power needs match your microphone
2) Start in a simple rhythm workflow
Choose a tempo approach first:
- Tap tempo to set the loop tempo quickly
- Use consistent strumming or drum feel when tapping so the groove locks in
3) Record on one track before layering
Begin by recording a loop layer on Track 1. Then switch to Track 2 only when Track 1 playback sounds stable and “where you want it.”
How to use the two-track system (AB split vs AB sync)
The most important concept for performance is how Track 1 and Track 2 relate. The Dual Loop Stereo offers two distinct behaviors:
AB Split (separate timing)
In AB Split style behavior, Track 1 and Track 2 can be treated like two different parts. This can be useful when you want more arrangement freedom rather than strict beat-to-beat alignment.
Typical use case:
- Track 1: intro or verse groove
- Track 2: chorus or bridge groove with a different feel
AB Sync (locked timing grid)
In AB Sync style behavior, both tracks follow the same timing structure. This is ideal when you want layering to always remain tight.
Typical use case:
- Track 1: rhythm guitar
- Track 2: lead line or second rhythm that must stay in phase
Drums and rhythm: using the built-in backing effectively
The Dual Loop Stereo includes built-in drum styles with controls for feel and variation. The most practical goal is to match drum groove to song sections.
Track-specific drum programming
A standout performance approach is to assign different rhythm styles to Track 1 vs Track 2. That way, switching parts also changes the drum context.
Example performance plan:
- Track 1 drum style: verse groove (simpler pattern)
- Track 2 drum style: chorus groove (more energy and variation)
Variation and strength
Most drum systems feel repetitive if you never change intensity. Use the available parameters to adjust:
- Strength (how hard or dynamically present the groove feels)
- Variation (changes in pattern character)
Performance workflow: 3 practical ways to play with it
Workflow A: “Lay rhythm first, then add parts”
- Set tempo.
- Record Track 1 as your main loop.
- Switch to Track 2 and record a melody, harmony, or additional rhythm layer.
- Switch between tracks to add and remove layers live.
Workflow B: “AB sections for a full song arrangement”
- Record the verse or intro on Track 1.
- When ready for chorus, switch to Track 2 and record the chorus layer.
- Assign different drum styles per track so the drums reinforce the section change.
- Perform by toggling layers while keeping the structure stable.
Workflow C: “Drums off when you only want looping”
If you want pure looping with no backing, disable the rhythm/drum behavior and treat it like a straightforward two-track looper. This is helpful for:
- Jamming with a band
- Looping into your own drum machine or external drum source
- Practicing a single musical idea without extra tempo pressure
Editing sessions and saving your setup
The Dual Loop Stereo stores work in internal sessions so you can return to a previous configuration. A simple strategy is to:
- Use one session for “song A practice”
- Use another session for “song B practice”
- Keep tempo and loop lengths consistent within each song session
For live gigs, consider saving separate sessions per setlist song so you do not rely on deep menu changes mid-performance.
Common mistakes (and how to avoid them)
1) Tapping tempo inconsistently
If tap tempo is set while the groove is already moving differently than your playing, the loop and backing can feel off. Tap once to lock a tempo, then keep your rhythm consistent for the first loop pass.
2) Recording Track 2 before Track 1 is locked
Track layering feels best when Track 1 is stable. Record Track 1, verify it sounds right, and only then add Track 2.
3) Mic input surprises
If using the microphone-capable input with phantom power, confirm your mic requirements. Phantom power can damage some equipment if misapplied.
4) Forgetting MIDI or expansion assignments
If you add an expansion footswitch or external MIDI controller, double-check what each control is mapped to. It is easy to accidentally change behavior from “stop/clear” to a different function.
How to choose settings for your style
Use these quick rules of thumb to decide between modes and drum usage:
- Want tight layering? Use AB Sync.
- Want arrangement-style section changes? Use AB Split and switch tracks at musically meaningful moments.
- Need energy for choruses? Keep Track 1 and Track 2 drum styles different.
- Practicing with a band or backing track? Turn drums off and let your external source drive timing.
Bottom line: is the NUX Dual Loop Stereo a good fit?
The NUX Dual Loop Stereo is well suited for musicians who want two-part looping with performance-ready timing options, optional built-in drums, and stereo routing. It is especially attractive if you want to build an “A/B” song structure without needing a laptop.
If you value quick hands-on control, track-specific rhythm layering, and a self-contained looper experience, this is a compelling choice for practice and live use.